Glass cabinet doors are a refined way to transform your kitchen, bathroom, or wine cellar into a visually lighter and more sophisticated space. They add elegance, offer display opportunities, and give cabinetry a more open, upscale feel. But achieving a seamless, professional look isn’t as simple as swapping out a few panels. Installing glass cabinet doors takes precision, planning, and attention to detail—especially when the cabinetry plays a role in showcasing prized wine collections or custom interiors.
At Pure Lux Glass, we specialize in glass installations that elevate both form and function. Whether you’re looking to modernize your home’s kitchen or upgrade your wine cellar cabinetry, here’s what you need to know about how to install glass cabinet doors the right way.
Why Upgrade to Glass Cabinet Doors?
Before diving into the installation, it’s worth considering why so many homeowners and designers turn to glass-front cabinets. First, they instantly create a feeling of openness. Solid wood doors, while classic, can make a room feel heavy or enclosed—especially in smaller kitchens or hallways. Glass, by contrast, reflects light, provides visual depth, and turns everyday items into part of your decor.
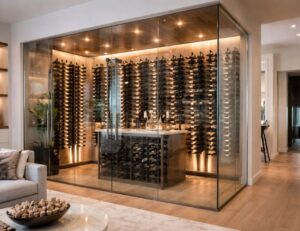
Additionally, for wine collectors, home chefs, and interior design enthusiasts, glass doors are the ideal solution for showcasing stemware, curated dinnerware, and of course, bottles of fine wine. When paired with interior lighting, they transform a simple cabinet into a statement piece. And for wine cellars or wine rooms, glass cabinet doors serve both a functional and aesthetic purpose—displaying the collection while preserving the ambiance of the space.
Step 1: Measuring and Preparing the Cabinets
As with all custom glass installations, precision begins with measurement. Installing glass into existing cabinet frames requires accurate interior and exterior dimensions, especially when retrofitting older cabinetry.
First, remove the current cabinet doors and inspect the frame. If the design includes a recessed panel, this space will typically be where the glass is installed. It’s essential to measure the recessed area (also known as the “panel opening”) to determine the size of the glass insert. If you’re opting for fully custom doors, you’ll also measure the total door dimensions to order glass that perfectly complements the frame’s proportions.
Depending on the cabinet style, you’ll also need to determine the type of glass mount: will the glass be set into a routed groove, attached using clips, or held in place by decorative mullions? Each method affects the size of the glass panel and how it should be handled during installation.
Step 2: Installing the Glass Panels
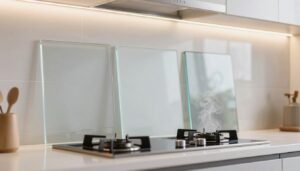
Once your glass has been custom-cut to size—whether it’s clear, frosted, textured, or low-iron for ultimate clarity—it’s time to install.
In cabinet doors with a recessed panel, the process typically involves removing the inner panel or cutting it out if necessary. Then, the glass is positioned into the routed groove or opening, cushioned by clear bumpers or silicone to prevent rattle or vibration. Depending on the design, it may be secured with glazing clips, custom trim, or a bead of clear silicone along the inside edges.
Proper handling is critical here. Cabinet glass may be thinner than shower or commercial glass, but it’s still fragile—especially along edges. Installing with care prevents cracks and ensures that the pane sits flush and level inside the door frame.
If your installation involves full glass cabinet doors without a frame, such as those used in wine cellars or modern kitchens, specialty hinges and soft-close hardware must be mounted directly to the glass. This type of installation is far more complex and should always be done by a professional.
Step 3: Re-Hanging and Final Adjustments
Once the glass is secure in the door frame, the cabinet doors can be reattached to their hinges. This step is more than just screwing things back in—it’s about fine-tuning alignment for symmetry and functionality.
Doors must open evenly, close tightly, and hang straight to maintain a high-end appearance. Any sagging or misalignment can affect both the aesthetic and the long-term wear of the hinges and frame. For wine cellars or display cabinets with temperature control, proper sealing is also essential to maintain internal conditions and prevent condensation from building up on the glass.
Once hung, the final step is to clean the glass thoroughly with a non-ammonia cleaner, polish any exposed hardware, and—if desired—install interior lighting to highlight what’s inside.
Wine Cellar Glass Installations: Display Meets Durability
If you’re upgrading your wine cellar cabinetry, Pure Lux Glass offers more than just cabinet door installation. We provide on-site wine cellar glass services, including the design and installation of glass doors, partitions, and climate-aware enclosures. These custom solutions enhance visibility and elegance while maintaining the protective environment your wine collection needs.
From etched glass panels and UV-filtering coatings to climate-compatible door seals and soft-close mechanisms, our work blends aesthetics with functionality to elevate your wine space into something truly luxurious.
Make Glass a Signature Element of Your Home
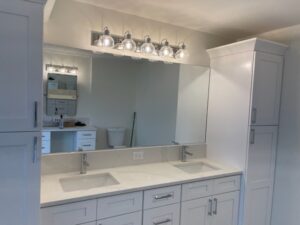
Whether it’s kitchen cabinets, bathroom vanities, or bespoke wine cellars, installing glass cabinet doors is a smart way to modernize your interiors and showcase what matters most. But precision matters—and with something as delicate as glass, it’s easy to make costly mistakes during a DIY installation.
Pure Lux Glass brings craftsmanship, clarity, and confidence to every project. Our experts measure, fabricate, and install custom glass solutions that suit your space, style, and budget. We go beyond ordinary glass services—we bring transparency and elegance to every corner of your home.
Ready to upgrade your cabinets or enhance your wine cellar with stunning glass doors? Contact Pure Lux Glass today for a free consultation and experience the clarity of professional installation.